


Review of Arctic Cruise

In the summer of 2009 I went on a cruise with National Geographic to the Arctic region of Svalbard. It was an amazing experience that I would highly recommend. The trip is run by Lindblad and National Geographic. It starts in Oslo, Norway and centers around the island of Svalbard. The images from this trip mark the start of a new series I’m working on centering around endangered and threatened species in their native habitats. Check back for more images to come from this new project…
Details of the trip after the jump!
Here is the link the trip’s website
http://www.nationalgeographicexpeditions.com/expeditions/polarbears/detail
Here is a copy of the itinerary that we followed:
———————————————————————————
Itinerary – 11 Days
Days 1 & 2 — U.S./Oslo, Norway
Depart on an overnight flight to Oslo. Upon arrival, check into our hotel. On an afternoon tour of this charming city, stroll among the famed Vigeland sculptures—hundreds of life-size human figures set in parklands. Visit the polar ship Fram museum, dedicated to one of the first wooden vessels to navigate the Arctic Sea. This evening is free to explore Oslo on your own.
Continental Hotel (B)
Day 3 — Oslo/Longyearbyen
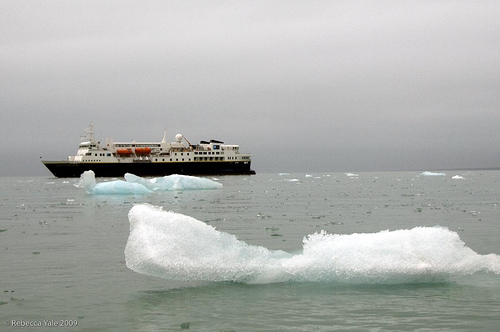
Depart Oslo on a private charter flight, and enjoy breathtaking vistas en route to Longyearbyen. Embark the National Geographic Explorer, your base for the next six days.
(B,L,D)
Days 4 through 9 — Exploring Svalbard
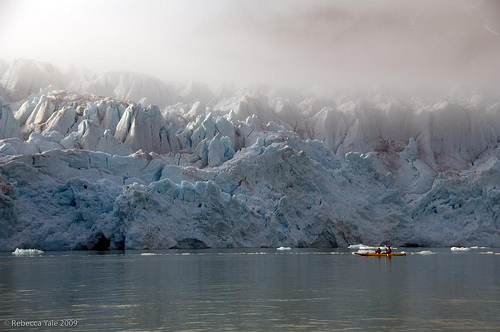
This voyage is undertaken in the spirit of discovery, and our travel in the archipelago is exploratory by design. In a region ruled not by humans but by polar bears, we let nature guide our course. Svalbard lies north of the Arctic Circle, where the summer midnight sun never sets. With our fully stabilized ice-class expedition ship, we are able to probe the ice in search of wildlife, and our exact day-to-day itinerary will remain flexible, depending on local ice and weather conditions. Zodiacs and kayaks take us closer to experience the geology, wildlife, and wildflowers that teem during the summer months.
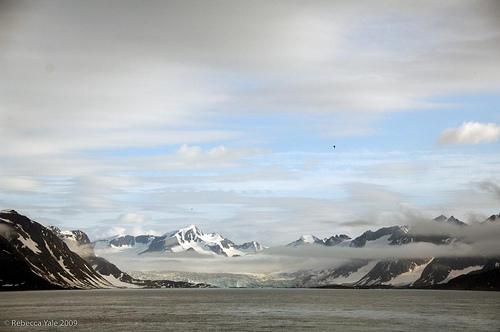
With our National Geographic expert and a seasoned naturalist staff, venture to the foot of stunning tidewater glaciers, kayak among sparkling icebergs, and explore fjords that split the rugged coastlines. Hike through miniature gardens blooming on the tundra; and search the edge of the pack ice for polar bears, walruses, seals, reindeer, and arctic foxes. Nowhere can the polar bear be seen more reliably in its natural environment than here.
(B,L,D daily)
Day 10 — Longyearbyen/Oslo
In Longyearbyen, the largest settlement in Svalbard, disembark and enjoy time to explore. Founded by an American coal executive in 1906, this is one of the northernmost human settlements on Earth. Fly back to Oslo this afternoon.
Radisson SAS Airport Hotel (B,L)
Day 11 — Oslo/U.S.
After breakfast, transfer to the airport for the return flight home.
(B)
———————————————————————————
NG charters a private plane to take the group from Oslo to Longyearbyen, the largest town on Svalbard. The town isn’t really much of anything to see, there are some cool old coal mines that you can see up in the mountains, but we didn’t have time to go check them out so we were really just ushered to and from a few museums with arctic artifacts. I- being of the MTV generation, with an attention span of a 4-year-old got bored and decided to wander around the town a little on my own. I couldn’t go too far though because this is polar bear country and you never know when one is just around the bend. We were told that they very rarely venture down into the town and when they do its usually in winter when they’re starving and desperate, so I was pretty safe, but you always have to be on the lookout. I wandered around and had a nice time looking at the interesting plants and very colorful row houses in the town. The one thing I wish we could have done, but would be impossible in such a large group, is visiting the sled dog kennel. I stood outside of it and watched the dogs for a bit, but I would have loved to tour it! I toured a sled dog kennel in Alaska and it was an awesome experience that I would highly recommend to any fellow animal lovers.
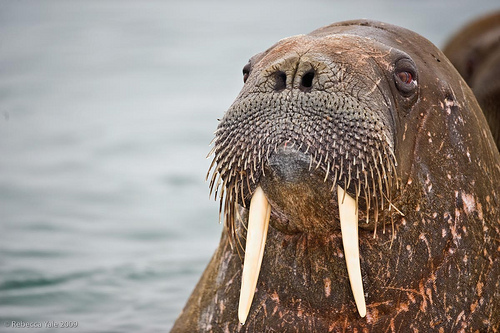
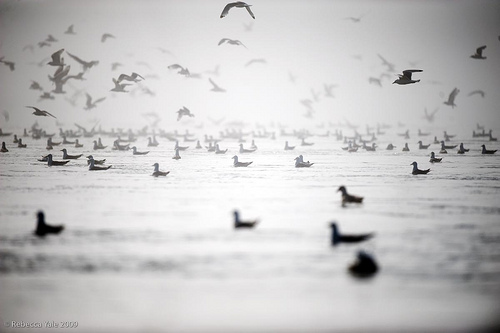
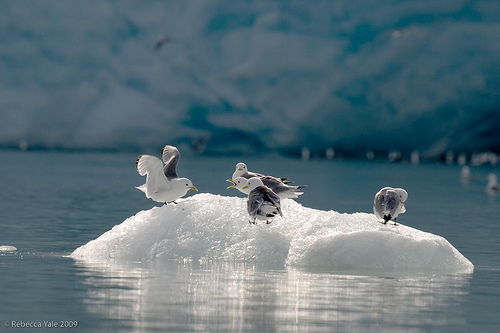
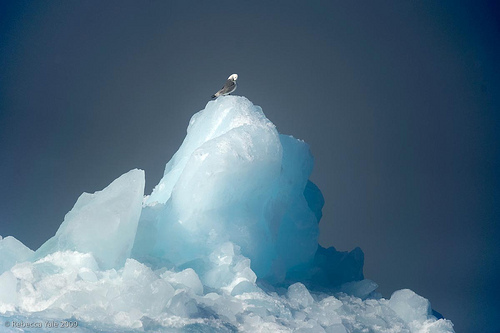
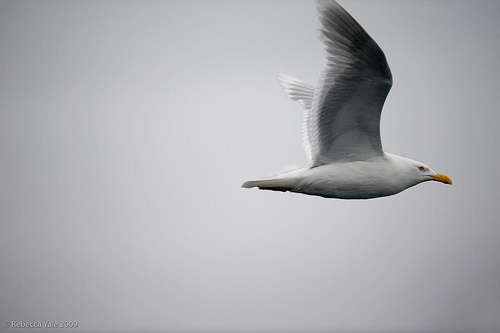
We boarded the ship that afternoon, and from there the trip follows no plan or pattern because the course is dependent on both weather conditions and where animals are spotted. If you are seriously thinking about taking this trip I warn you- just plan on getting little to no sleep for the full 11 days. This is the land of the midnight sun- it is light out 24/7, and while the rooms do get relatively dark there is always something exciting to see at all hours of the day and night. Most of our polar bear sightings happened from 1am-7am. If your anything like me, polar bear sightings are the main goal of your trip, and while they’re not guaranteed, the staff works their butts off to find you one. The week we went was extremely foggy and therefore it was hard to spot them in the distance, we saw 5 total- whereas the cruise the week before us saw 26 because there was no fog, it is really luck of the draw. Other cool animals you will most likely see are walruses, arctic foxes, reindeer, bearded seals, hooded seals and maybe a whale or two. One species I can guarantee you will see- BIRDS! I promise you will see thousands upon thousands of birds! We saw glaucous gulls, kittiwakes, arctic terns, puffins, and thick-billed murres, just to name a few. We saw them swarm at Monacobreen Glacier and at the bird cliffs of the Hanging Gardens and Cape Fanshawe. A little tip (they will most likely tell you anyway) when you are nearby the bird cliffs, cup your hands to your ears and hear the sound of the birds instantly amplify- it is a moving experience.
At the end of each review in this blog I will include a section of tips and tricks which will be a small list of things I recommend or wish I had known, I will also include what photo gear I brought with me.
Tips and Tricks
- Try and request a room near the bow of the ship, this is where we spent most of our time watching the animals and it is annoying to have to keep running to your room to grab your photo equipment or warm clothes.
- It is nice to have a balcony, but really not worth the money, you will not spend much time on it, I didn’t really spend much time in my room at all.
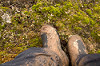
- Have really good waterproof clothes, you basically want to create a seal from your toes to your neck that is wind and water resistant. I used: zodiac boots with thermal socks underneath, thick leggings underneath rain pants (which I tucked into the boots) then thermal underwear long sleeve shirt underneath either a long sleeve shirt or sweater (which I tucked into leggings) and then a rain coat or sometimes down coat over it, on your hands you will want both glove liners and gloves (you may want to remove the top layer while photographing, but them put them back on because it gets COLD!) Also don’t forget accessories! You are going to want a scarf that you tuck into your jacket to keep your neck and chest extra warm, also a hat is nice on the really cold days, and hides your gross bedhead if you don’t have time for proper grooming, which trust me, you won’t! Sunglasses are also very important, the glare off the ice can do permanent damage to your retinas on a sunny day so be careful! If you want to get good pictures on land you will be in the mud and water- it is gross and cold- so i repeat that you want to create as much of a seal as possible so you don’t end up wet, dirty and cold! If you don’t believe me here is a picture of my boots after lying in the mud to get a picture of an Arctic Tern.
- Take advantage of the afternoon hot chocolate! It is delicious and warms you up from the inside out!
- For all my long haired gals, there is no need topack a blow-dryer, there is one in each room. You do not want to go outside with wet hair, it will literally freeze on your head!
- Spend some time on the bridge. The crew is really welcoming and helpful! They encourage you to come up and watch them navigate and help them look for animals in the distance. You can also look at cool maps and graphs that show interesting facts like ice patterns and track the ice melt.
- Ask the crew for help identifying the animals in your photographs before you leave! You think you remember the difference between a thick-billed murre and a black guillemot? Just wait until your sorting through thousands of photos of tiny black and white birds- I promise you- you will get confused! I made a folder with one really distinctive photograph of each bird species I had a photo of and then had one of the naturalists id each one so I could refer back to those images while captioning my other images.
- Don’t be afraid to ask questions! My only real complaint about the trip was, as a young woman, I felt very pushed around by a few of the naturalists. A few of them were not very nice and it made it really difficult for me to ask questions. I am not by any means a timid person, but once I’ve been scolded or chastised in public I get scared to speak up again. Remember that these people are here for you, they may be serious scientists and have an attitude because they are sick of answering the same questions that they think are stupid- but remember they are hired help here to do just that! Don’t be afraid to ask for things- on the first excursion ashore I chose to to go on a photo walk and it took a very long time so our naturalist told us we would not have time to go on a zodiac boat to see the puffins. My father and I thought this was ridiculous and asked our naturalist to please radio the ship and ask if we could do it. He grumbled and reluctantly did it, the radio was loud enough that we could hear the response, so when he asked them we heard them say “of course, we’ll send one over to pick them up!” our naturalist turned to us, grunted again, and said “they said maybe.” So it is luck of the draw with the naturalists you get, but don’t be afraid to stand up to them, they work for you, not the other way around. It is important to listen to them though, they are dealing with large groups of people, and it is polar bear country and they need to make sure they can see you at all times and protect you in case a polar bear decides you would make a nice snack. (A little note, they all carry shotguns, which they all told me they’ve never had to use, but if a polar bear shows up, you want to be close to the man with the gun.)
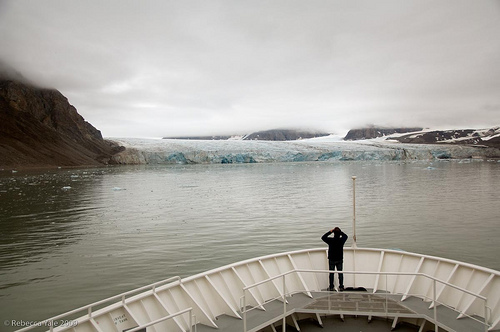
- When there is an animal sighting aboard the ship make a beeline as fast as you can (without tripping, which I did many a time) to the bow of the ship. Position yourself at the very front, I literally spent most of my time lying on my stomach at an angle on the bow with my feet propped up against this little ledge/hole in the front of the ship. It was really uncomfortable and afterward it felt like both my ankles were going to shatter, but i had great unrestricted views, and I hope my photos speak for themselves as to the advantage you will get.
- Have some form of photo assistant. For me it was my father, who was nice enough to forgo taking photographs himself to run back and forth to our cabin to grab equipment, hold my extra camera, and help with quick lens changes. In a situation like this you turn your back for a second and you will lose your spot and may miss out on the action. You may not be lucky enough to have a great dad nice enough to run around trying to find your missing glove and bringing you hot cocoa, while your on polar bear stake out, but maybe make a deal with someone that you will share your photos with him/her if she/he is willing to hold your extra camera and be ready with extra batteries (which you should bring lots of, cold weather depletes these very fast! There are both American and European outlets in the room so you can easily recharge batteries, but I would have at least 2 batteries per camera body.)
- Here is a list of the equipment I used, the only things I brought with me and didn’t use was my flash and tripod. The beanbag was helpful, but I ended up just holding my lens most of the time- it is heavy, but worth it. Everything listed below was important and helpful!
- Nikon D2x
- Nikon D3
- Nikor 500mm f4 VR lens
- Nikor 18-200mm f3.5-5.6 VR lens
- Nikor 105mm f2.8 VR lens
- Small bean bag with camera mount
- SLIK Carbon Fiber Monopod
- Small folding reflector
- Lens cleaning kit
For those of you who are amateurs or just beginning their professional career, there are great places to rent whatever equipment you don’t have.
I have rented with very positive experiences from
Adorama Rentals (NYC)
http://www.adoramarentals.com/
Samy’s Camera Rentals (NYC)
http://www.samys.com/index/page/static/subpage/rentals
Borrow Lenses.com (By Mail)
http://www.borrowlenses.com/
(Borrow lenses is where I rented both the Nikon D3 and the Nikon 500mm lens for this trip.)
If you are a student, most places offer discounts so always ask! Also if you are a student a great insurance provider that supports these rentals is CSI, which offers you up to $25,000 in camera gear protection with only a $25 deductible!
CSI
http://www.collegestudentinsurance.com/
I hope this was helpful, please feel free to leave comments with any additional questions you may have! Below you will find a slideshow with more images from the trip.
Enjoy!
Created with Admarket’s flickrSLiDR.
A cool application that allows you to map out your world travels
visited 22 states (9.77%)
Create your own visited map of The World
